Showing posts with label WordPress. Show all posts

Complete facebook: A wordpress plugin


Now you can enable facebook like, comment for each post of your blog. Sometimes people need to get registered on the site in which they want to comment on any blog. But it seems difficult to comment by registering on any site. I will give you a plugin. With this plugin you can enable like, share for a specific post or for all post or blogs.

How to download

  •       At first, you have to go to the following site.


               http://www.wordpress.org/
  • Then you will see a page like the following figure
  • On the top of the page, you will see a heading WoRDPRESS.ORG. Beside this, you will see some menu. From these, you have to click on the menu plugins. Then a window will start to load like the following figure.
  • From the window, you have to search your required plugin. You will see a search box above Featured Plugins. You have to type Complete Facebook on that box and search. See the search result like the following figre.
  •  You will see many results related with complete facebook. You have to choose the first one. Click on that, and see like the following figure.

  • For your convenience, the download option is marked with red color. Click on that.
  • If you want to know anything about installation this plugin, then click on the red marked install option.
  • If you want to know the plugin feature, then you will see some red marked features on the bottom of the page.

How to upload:

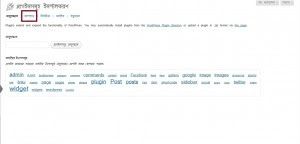
  • At first, login to your blog > dashboard. From that, you will see an option named plugins. Point the mouse on that. You will see some sub-options. Like, Installed Plugins, get one more etc. click on get one more. Then a new window will start to load like the following figure.
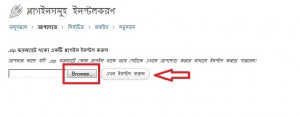
  • Click on the red marked box of the above image. So that, you will go to the uploading page. Click on that, you will see like the following figure.
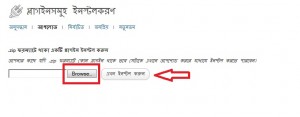
  • Click on the browse button and show the downloaded file. then click on the button which is beside the browse button.
Wait for a while, for installing the plugin. No more today, have a good day friends…..!
Photo source: http://www.pchelplinebd.com/

How to get your blog post on the 1st page of Google


Now-a-days SEO is a very common word for bloggers. It means search engine optimization.
There are many phases of SEO. Today I am going to disclose about On post SEO what is very important for internal SEO. The first step of SEO starts with blogging or writing article. At first you have to choose a title for your article that is often been searched on search engines. Try to step up with Search engine trends. An easy way to find out the trend is to search that peak word on Google search box. You will find some automatic suggetions there.  Choose any one of them. And any high demandable word with that like- top, best etc.  always try to make your title short and a unique.
If you are a WordPress user then you have to install All in One SEO Plugins. Put your title on All in One SEO option & arrange a small description of your article on Description. Don’t miss to add your targeted key words here. Select Keyword & publish it. That’s all!
After  Google indexing search your article by your article’s title on Google search box and get your post on the first page!

The complete CSS tutorial for beginners- part 2


Friends..again we came with the tutorial about CSS. This is the 2nd part of this tutorial. On this part we will disclose about class selector & ID selector. You can also catch the 1st part of this tutorial here.

Class selector

Class selector is one of the technique to specify any part or one or more components of web page of CSS. Multiple items can be identified by one class Selector, that’s how it helps to reduce the amount of coding.
Like- CSS code for <p class="mar"> 24 / 7 Support</p> is-
.mar{color: #C03;
font-size:36px}
Here class key-word is used in HTML tag to point out class selector. Then it needs putting a “=”sign there & enclosing the class name in double quotes. Like- <p class="mar">. Here “mar” is the class name. Dot sign (.) is used to point out class on style sheet.
Next we are going to discuss about ID selector.

ID selector:

ID selector is a popular way of CSS to specify any part or or content of a web page. But you cannot identify multiple contents by a single ID selector like class selector.
Like- <p id="post1"> We are bangladeshi Hostgator hosting provider. The world wide technical and support team is working for your best movement.  information. 
Like- CSS code for </p> is-
#post1{color:#066;
font-family:Tahoma;
text-align:justify;}
ID key-word is used to indicate on HTML tag. Then it needs putting a “=”sign there & enclosing the class name in double quotes. Like- <p id="post1">. Here the ID name is post1. (#) sign is used to point out ID on style sheet.
Thank you all.

The complete CSS tutorial for beginners- part 1


Here we came to describe a complete tutorial about CSS. This is the first part of this tutorial. If it helps you in anyway my effort would be succeeded.

What is CSS?


CSS is the abbreviation of Cascading Style Sheets. It is the simplest technique to determine the content, size, shape, position, color, motion etc. of a web page.
Selector
CSS is used to identify the different parts of a web page created by HTML & determine the structure, size, shape, position, color, mobility etc. of it. There are several selectors used for it. They are-
  • Tag selector
  • Class selector
  • ID selector

Tag selector
In CSS, when HTML tags are used to determine different parts of the web page that is called Tag selector. Like-
body{background: #FC9;
font-family: Tahoma;
color: #F60;}

practice project
<html>
<head>
<title> Selectors</title>

<style>
body{background: #FC9;
font-family: Tahoma;
color: #F60;}
</style>

</head>
<body >
<marquee>
<h1>www.tutohost.com</h1>
</marquee>
</body>
</html>
That's all for today. Check here for the following part of this tutorial.

How to create a free WordPress blog using Cpanel- part 3


How are you all? This is the third part of my tutorial. Go here fro previous parts. Here we are going to discuss about installing WordPress. Let’s do it!
Who wants to install Bangla config of WordPress download that from here.
And the English config of wordpress can be downloaded from here.
At first click here & put your user and password & log in.
Then open file Manager.
After that, select your dot.tk domain & click on Go.
Delete the files shown below.
Click on upload.
Click on Browse.
Then click on the WordPress to open what you have downloaded from here.
It will start uploading. Wait until it completed.
Reload the previous page of it after upload is been completed.
Then select the file & click on extract.
Click on close. Reload it so you will find all files.
Open your dot.tk domain. A page will appear there like following. Click on Run the install.
Put your user and password on your database.
Put your blog name, admin user, password & e-mail and then click on install WordPress.
A confirmation message will be there. Click on enter.

Put your admin user and password & click on enter.
You will get your admin panel there.
Visit from your dot.tk domain so you will get a page like following one.
Thank you all.

How to create a free WordPress blog using Cpanel- part 2


How are you friends? This is the 2nd part of this tutorial. We discussed about the registration process of domain on our previous session. Today we are going to discuss about creating database of your blog. Because, without database you won’t be able to install Word Press.
  • Then click on mySQL Database wizard.
  • After that, follow the instructions shown below.

  • Here I am using 01. You can put anything you want just remember that thing. 


  • Here I am using 01 again. Use the same word or number or whatever you used right before it & type an easy-to-remember password here it have to use it later.


This is only about creating database. i will provide you the other necessary stuff on upcoming parts. 

How to create a free WordPress blog using Cpanel- part 1


How are you guyzz! Today I am going to tell you how to create a free blog using Cpanel. This is the 1st part of this tutorial. On this part I will let you know about the registration process of a .TK DOMAIN.

What is domain?

Domain is the web address of your site. Visitors will recognize your site through it.

How to register domain?

At first go to this link- www.dot.tk & click on Login to My dot tk.
So that, following image will appear there. Click on the Facebook icon.
Type your facebook email and password & click on log in.
Click on log in with facebook.
Click on allow.
A page will appear like following one.
Click on add a new domain from my domains.
Type your domain name & click on Next.

Select free domain & click on Next.
Then click on use DNS for this domain.
after clicking on use my own DNS services & put any of these two DNS for free hosting-
ns1.free.hostzilla.ws
ns2.free.hostzill.ws
Select 12months instead of 3 months. Fill up the captcha given below & click on next. That’s all! The domain is yours now! Go here for the rest of this tutorial.

Most efficient way of using meta tag


We use Meta tags in many sites for various purposes. Especially it plays a vital role in SEO. Here I am going to discuss about some Meta Tags we use.
Keywords- Meta Tag
This is the most useful Meta Tag for SEO. This Meta tag provides the search engines the information about the content of your site. Choosing Excellent Meta tags will lead you to your the desired consequence in SEO. Keywords- Meta Tag is like this:
< meta name="keywords" content="some keyword,another keyword" />
Put comma after every key-word.
Description- Meta Tag
This Meta tag is also important for web site. It will reflect the main content of your site on search engine. Basically this tag is used to describe the content of your blog.  This Meta tag is like this-
< meta name="description" content="A blurb to describe the content of the page appears here"/>
Author- Meta Tag
You can use this Meta tag for the visitors of your site telling them about the author or blogger of your blog. This Meta tag is like this-
<meta name="author" content="hasan faisal" />
Revisit-After- Meta Tag
If you use this Meta tag then your site will be visited & indexed after a certain lag of time.
Like- if you use this tag then your site will be revisited after every 15 days. You can change the time according to your need.
<meta name="revisit" content="15 days"/>
Refresh- Meta Tag
Who likes to update their site in every minute this Meta tag will be helpful for them. Because visitor feel bother to refresh these kind of sites again & again. So you can specify a certain time for auto refreshment with this tag. Like-
<meta http-equiv="refresh" content="600">
If you add this tag on your site then your site will be automatically refreshed after every 5minutes.
Robots- Meta Tag
This Meta tag plays a vital role on search engine. With this Tag you can instruct the robot of search engine to index your site. If you use following tag then the robot will understand that it can index your site.
<META NAME="ROBOTS" CONTENT="INDEX,FOLLOW">
Or, if you use this tag that means you are telling not to index your site.
<META NAME="ROBOTS" CONTENT="NOINDEX, NOFOLLOW">
There are some more tags for Robots. Like-
ARCHIVE- Meta Tag
This tag allows you to archive all data in search engine. If you want to then use-
<meta name=”robots” content=”ARCHIVE” />
Or if you won’t then-
<meta name=”robots” content=”NOARCHIVE” />
ODP/YDIR- Meta Tag
ODP means open directory project. When Google search engine robot doesn’t find any description tag in a site that time they take help of DMOZ. If you want Google to avoid this thing then you can use this tag- <meta name=”robots” content=”NOODP” />
Or, if you want Google to do this then use this tag- <meta name=”robots” content=”ODP” />
Yahoo does the same thing like Google. But in that case Yahoo uses its self open directory project (YDIR). So in case of Yahoo you can use these codes-
<meta name=”robots” content=”NOYDIR” />
& <meta name=”robots” content=”YDIR” />
There are various search engines on internet. But there are some search engines for what you have to use specific robots Meta tags. Like-
For Google <meta name="googlebot" content=”index">
For Yahoo <meta name="Slurp" content=”index">
For MSN<meta name="msnbot" content=”index">
Language META Tag
This Meta tag let you know which language is used on your blog. Usually, English is the most commonly used language for websites. This tag is like-
<META HTTP-EQUIV="Content-Language" content="EN">
That's all for today! Have nice day!

Create sticky posts


Sticky post is that type of post, which remains at the top of the author’s page. Sometimes it announces some important information such as announcement for any upcoming event.


When posting blogs, we see the latest post first. Sometimes we need to place any special post at the top of the page. So we have to edit the placement of the blogs. For this, we have to follow the procedures-
  •  At first post the topic to the blogspot.
  • Then go to edit post.
  • Set any future date, on the publishing date of the post.
  • Update the post.
You are done. This post will be sticky until crossing the future date what you have set.
Thanks to all…


Transfer WordPress to Blogger & Blogger to WorsPress


We know WordPress is the best platform for blogging. But WordPress limits some necessary works for free users. Like- use of JavaScript and Ad sense what is only applicable for premium users. Whatever, if you want you can easily transfer all posts & comments of WordPress blogs to Blogger.
Required steps:
  1. Login to your wordpress account-> Dashbord >Tools>Export> click on Download Export File button. save the file to Hard Disk.
  2. Now go to the site of WordPress2Blogger-> click on Choose file button. Browse the previous files & click on convert & then again save the files.
  3. Login to Blogger Dashbord>Settings>Blog Tools> Click on Import blog and browse to the location of converted file & import those.

You can also transfer Blogger to WordPress Blog in the same way.
Required steps:
  1. sign in to Blogger.
  2. Go to WordPress account where you will move the posts->Dashboard->Tools-> Import->Click on Authorize button-> Click on Grant Access button-->now you can see the posts in Blogger blog-> click the Import button 
And you are done!


Want to be a successful blogger? Learn here about WordPress.com & be one of them( part- 8)


Friends..let's start with the last part of this tutorial here. You can check here for previous part of this tutorial who missed that.
Now let's learn the use of some most important options of admin part-

Now I am going to show you some techniques to make your post more attractive.
How to change theme?
Theme is the most important media to attract the visitor. So it is important to choose a perfect theme for your blog.


To change the theme, click on “theme” from “Appearance”.There are hundreds of themes. Some of the Premium, but most of the themes are free. Choose a free theme & click on “activate it”
How to add widgets to your blog?
Make your blog more appealing by adding widget. Click on “Widget” from “Appearance”. Drag the widget you chose & drop that on “Main Sidebar”.
How to make Menu?
Click on “Menu” from “Appearance”. Give a name of it & click on “Create Menu”.

How many menu you can create there will depend on your theme.
Select the manu you want to see on your blog from “Theme Locations” & click on “Save”. If you want to add Custom Links in menu then enter the address on "URI", label it & click “Add to Menu”. In this way you can also add Categories and Pages.
Click on “Save Menu” after adding Customs link, page.


Well done! You have successfully added menu to your blog.
How to change site title and tagline?
To change site title & tagline click on “General” from “Settings”. Enter the title of your blog on Site title & write a few words to describe your blog on Tagline.
Finally, click on "Save Settings".
That’s all! Your site's title and tagline has been changed.
This was the using of some most important options of Admin.

Some tips:
1.  You can visit your blog directly from dashboard instead of typing your address repeatedly.
To do that right click on your blog name & click on "Open Link In New Tab".
2.  You will get “Screen option” below most of the options of admin area. From here you can add/remove the windows you want to see on that present screen.
3.  You can set the left site options of area in two ways. Icon with caption or without caption, it’s up to you.
That’s all of this entire tutorial. Let me know how did it help you!